There are two ways to set up and install WordPress for a blog or website. Beginners don’t always realize there’s a difference. It basically comes down to hosting and ownership. These are your options:
- WordPress.com – Host your site/blog on WordPress.com (meaning you are essentially “renting” hosting from WordPress, giving you less control and ownership)
- WordPress.org – Purchase a hosting plan independently and install the free WordPress software on your server (meaning you have complete control and ownership of your website/blog)
You can read about the differences in more detail here.
Rule of thumb is that it’s better to build your brand on your own hosted domain instead of having a wordpress.com blog or site that is hosted on WordPress. For those who are not tech savvy, signing up for a WordPress.com site might seem like the fast and easy solution to getting up and running, but if you’re willing to invest a little time setting up your site now, it’ll pay off in the long run.
Plus, setting up WordPress on your own domain is easier than it sounds, and most hosting companies have one-click WordPress install available. While there are a few ways to get WordPress installed on your domain, I’m going to walk through the FTP setup.
Step-by-Step Install WordPress on your own Hosted Domain:
This beginner WordPress tutorial assumes that you already have a registered domain with web hosting in place and can access your cPanel.
Download the Free WordPress Software:
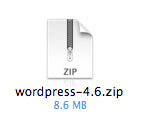
Step 1: Go to WordPress.org and click to Download WordPress to your computer.
 Go to the download folder on your desktop and double-click the zipped file to un-zip it.
Upload WordPress Files to Your Root Directory :
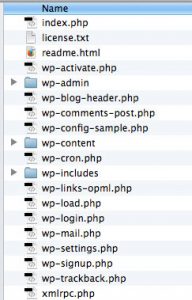
Step 2: Open an FTP program — such as FileZilla or SmartFTP.
Step 3: Upload all WordPress files via FTP to the root of your site – i.e., the public_html folder
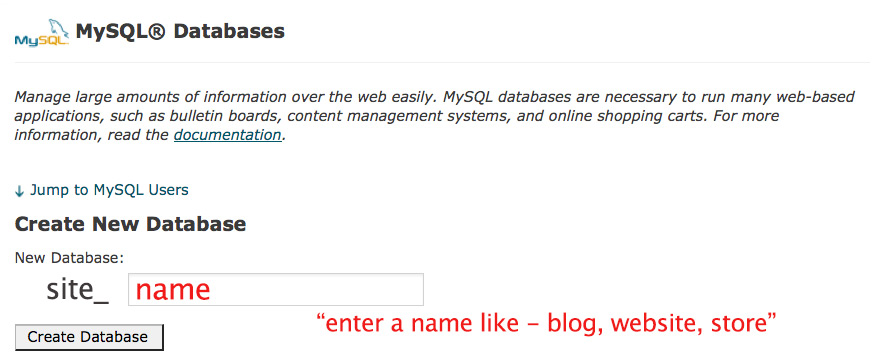
Create a Database in CPanel:
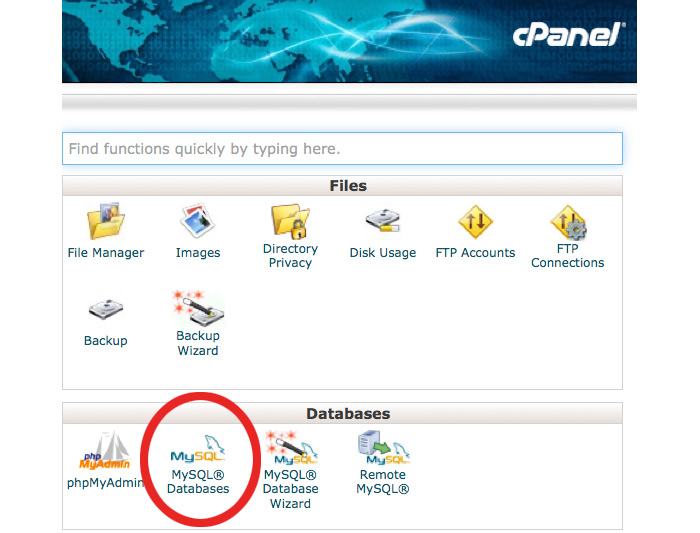
Step 4: Login to your host cpanel and go to your domain’s cpanel > MySQL Databases
Step 5: Create New Database and enter a “name” in the box to append to your site (I usually name it “blog”)
Step 6: Click “Create Database” button.
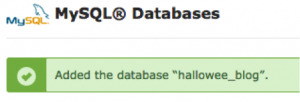
You will get a confirmation message that lets you know the database has been added.
Next, Create a UserName:
Step 7: Fill in a username in the blank field – I usually use “blog” again.
Step 8: Create a password
Step 9: Click “Create User” when done
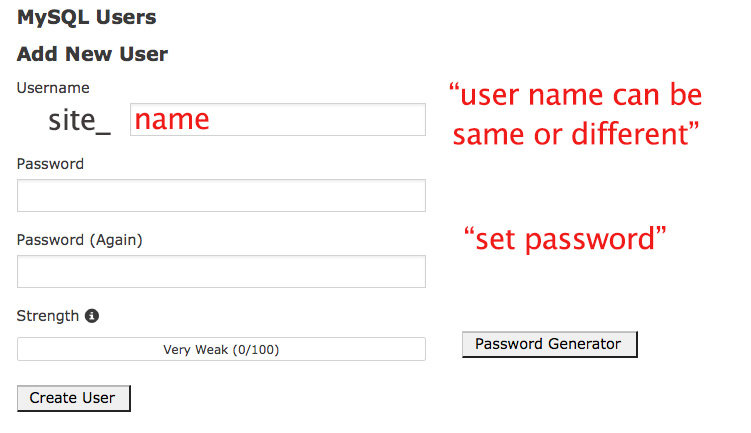
Step 10: This confirmation message that lets you know the user name has been added.
![]()
Connect the UserName to the Database: (Fields will auto populate)
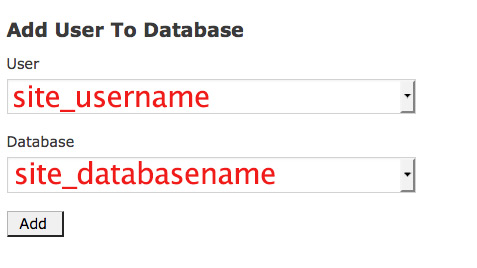
Step 11: Click “Add”
You will receive confirmation hat lets you know the user name has been added to the database.
Manage User Privileges:
Step 12: Check All Privilegs
Step 13: Click “Make Changes”
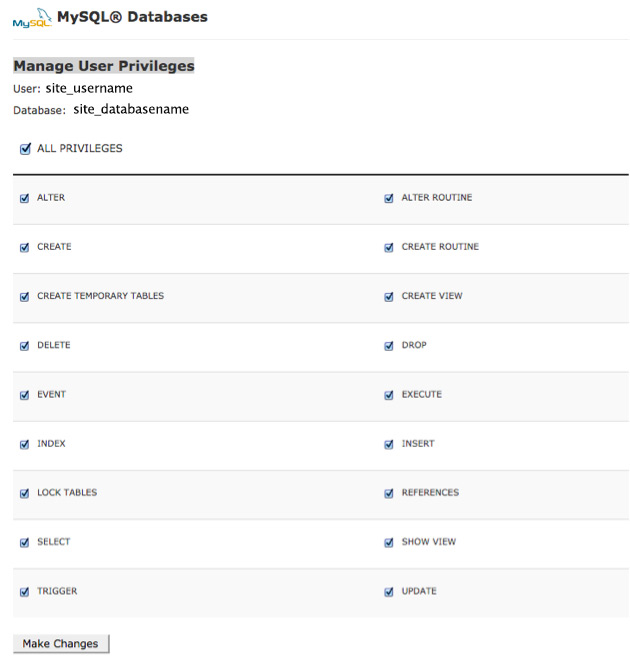
Again, a confirmation message that lets you know the you have given the requested privileges on the database to the username.
Congratulations, you are done setting up the Database.
Configure WordPress
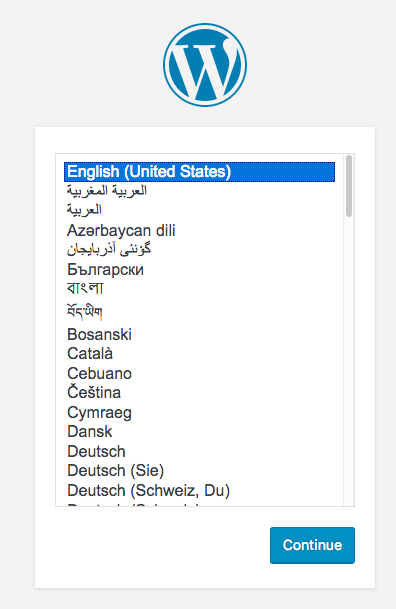
Step 14: Now go back to yoursite.com/wp-admin and select your language and “Continue”
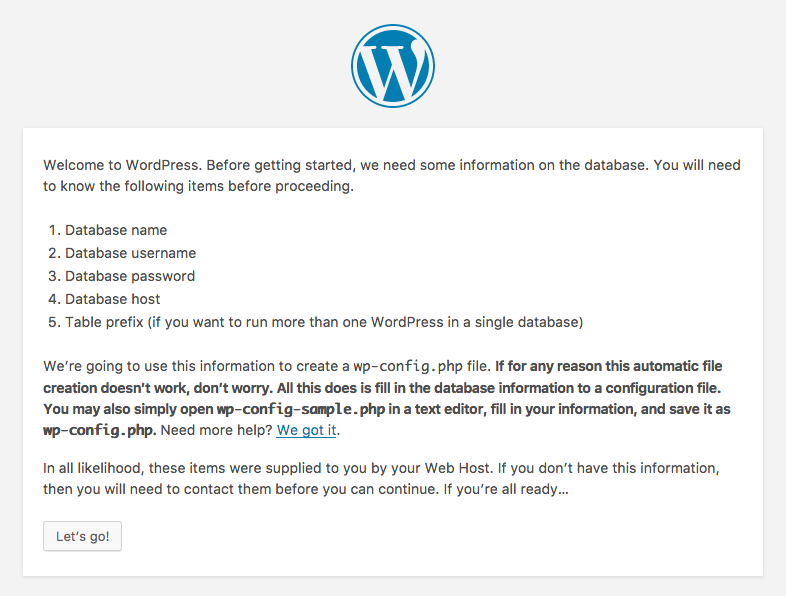
Step 15: In the next window, click ‘Let’s go!”
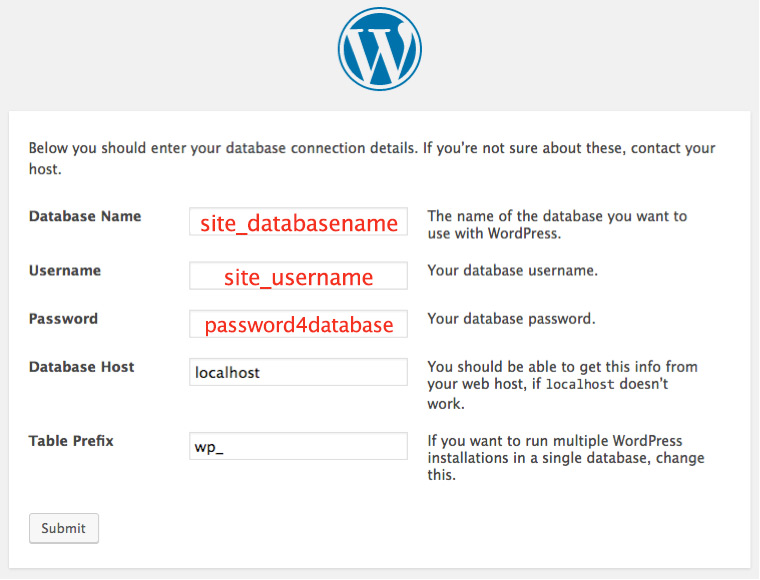
Next, you’ll see this:
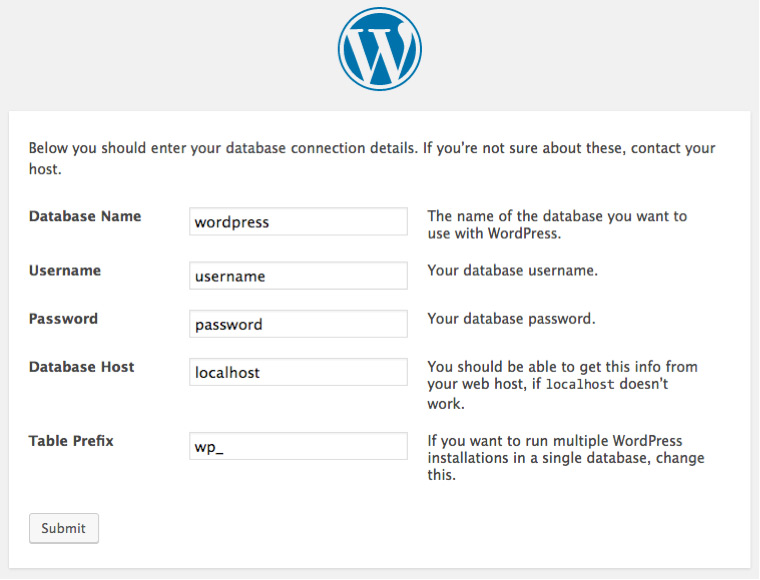
Step 16: Fill in the information you just created in mysql cpanel. Then press the “Submit” button.
Run the WordPress Install
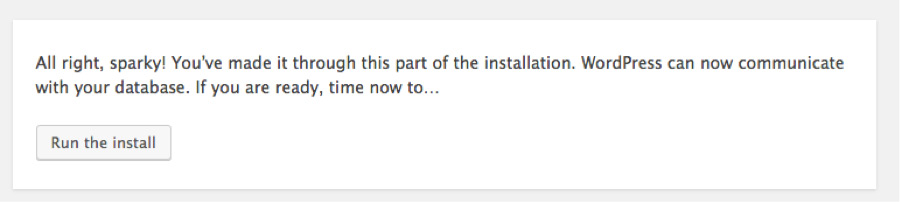
Step 17: You’re almost done when you see this inspiring success message “All right, sparky! You’ve made it through this part of the installation. WordPress can now communicate with your database. If you are ready, time now to “Run the Install”, so click the button.
Next up you’ll see this “Welcome to the famous five-minute WordPress installation process!” page:
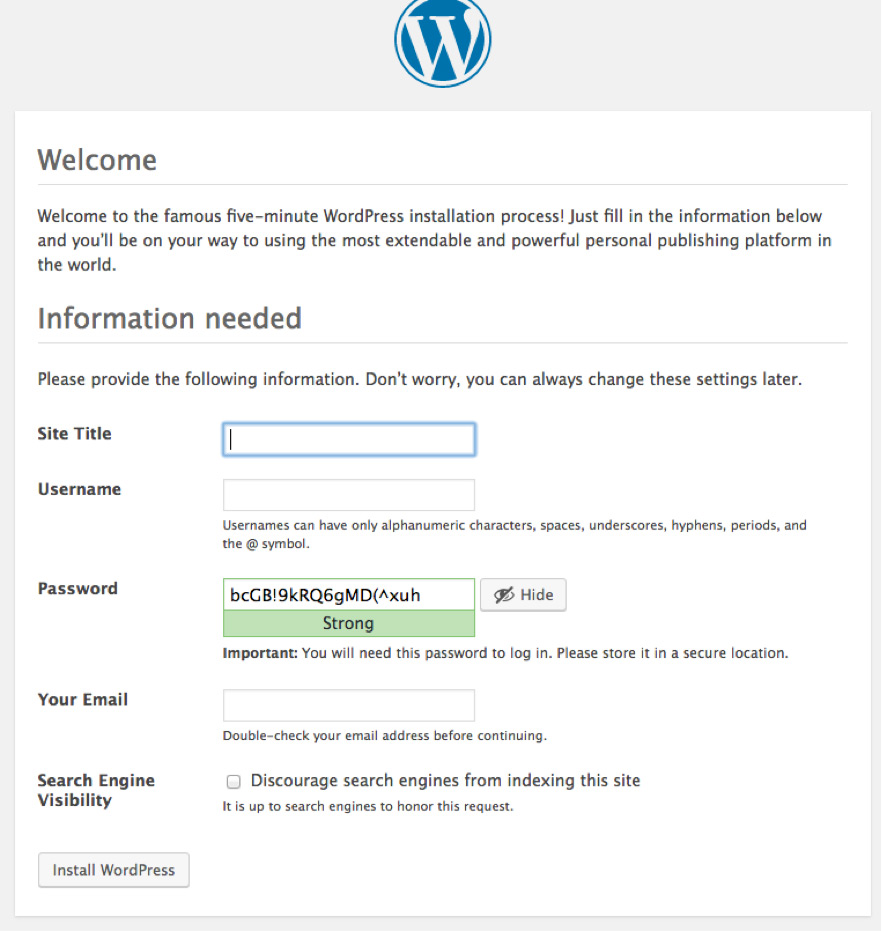
Step 18: Fill in your information and create a password:
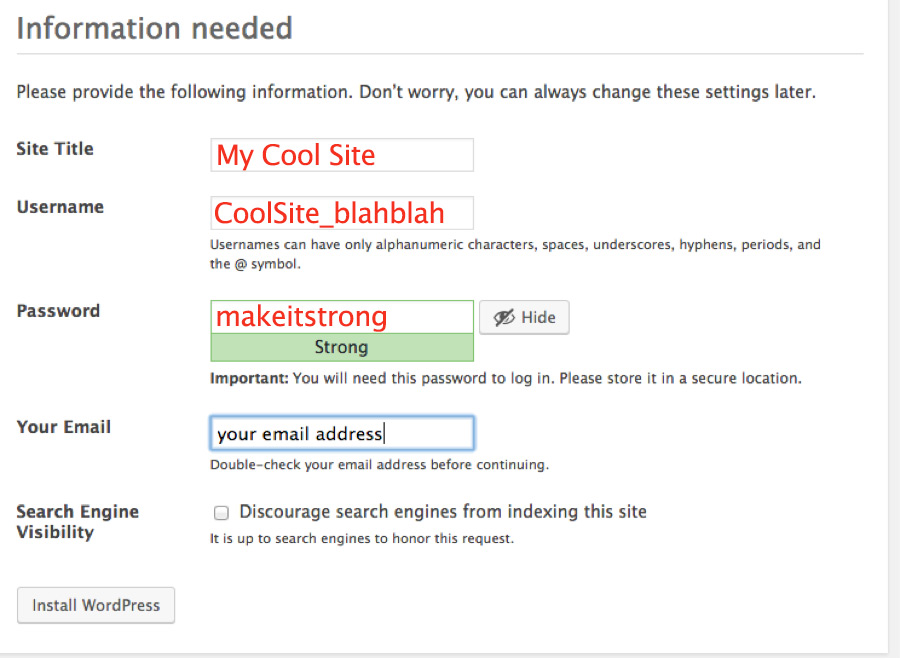
Step 19: Click “Install WordPress” and you’ll get this SUCCESS message:
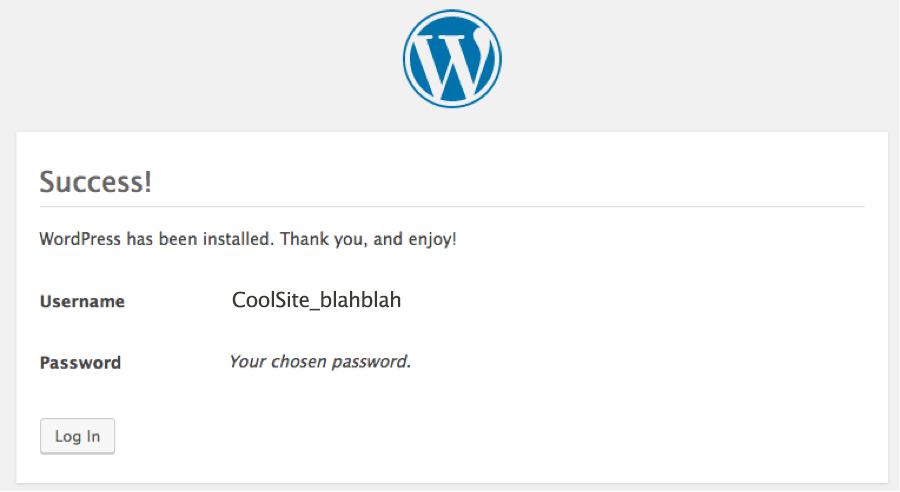
Congrats, You’re DONE with your WordPress Installation!!
Step 20: Press the “Log in” button and you’re ready to rock n’ roll!
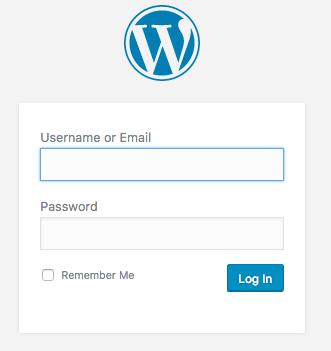
LOGIN with your username and password and you should see your WordPress dashboard. Now the magic begins!
From now on, you will access your dashboard by logging in to WordPress at “http://www.yourwebsite.com/wp-admin“
You are now ready to start creating your WordPress website.
This post may contain affiliate links. See our disclosure policy for more info.
Leave a Reply