*This post contains affiliate links, which means that by clicking on a link and purchasing a product, I’ll receive a small commission, at no additional cost to you. Please see my disclosure policy for details.
In this tutorial, we’re going to change the weight of Blog Post title and the font color of the H2 and H3 headers in the Genesis child theme, Modern Blogger Pro. Accessing the style.css in your WordPress dashboard is something you can do no matter what theme you have. So using this same technique, you can look for the CSS elements in your own theme style.css to make similar changes.
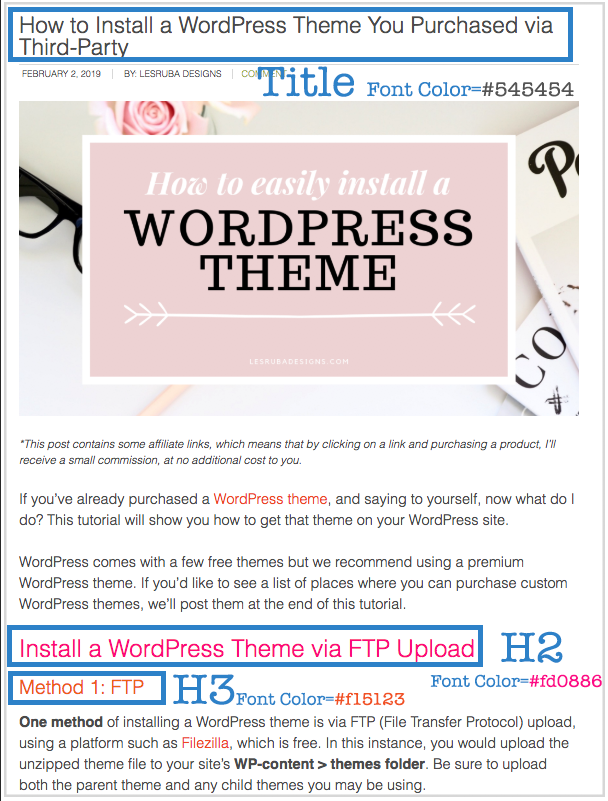
In the screenshot example below, we will change the weight of the blog Title Font, the H2 Font color and the H3 Font color. Currently the title is hex code color #545454 (a soft grey), the H2 header is color code #fd0886 (pink), and the H3 header is #f15123 (orange).



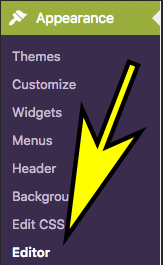
In order to change elements of your theme, you want to go to your WordPress dashboard >>Appearance >> Editor:
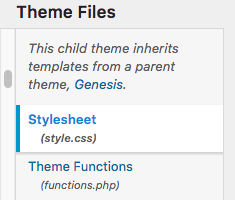
Then you want to be sure that Style.css (Stylesheet) is selected on the right side. This is where you can change many elements of your WordPress site, and it tends to look rather ominous if you’re new to this whole thing and don’t have much technical savvy. However, we’re going to easily show you had to change some font colors and line weights to customize the look and feel of your blog.

Change Blog Post Title Color and Weight
To change the blog post title color, look look in the Stylesheet for the /* Headings that appears AFTER the /* Genesis line. NOTE: there is also a /* Headings section that appears closer to the top in the Default section, ABOVE the /* Genesis line and we’ll use that later to change the H2 and H3 elements. So for now, go to the one after Genesis.
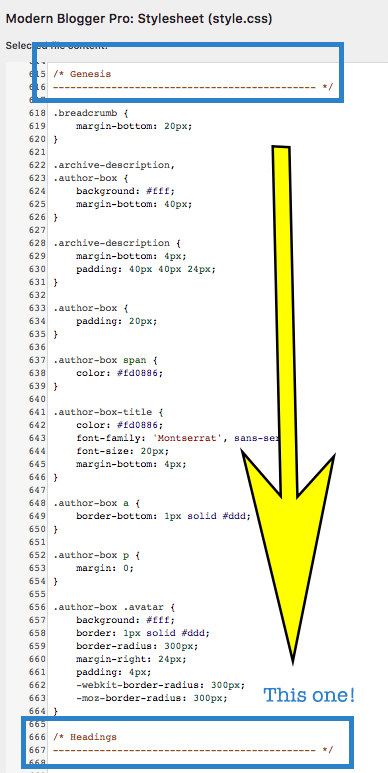
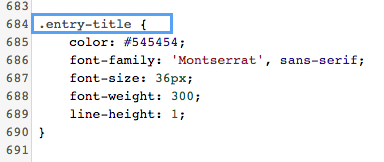
Look for .entry-title { like in the image below. As you can see the color is set to grey, and the font-weight is 300.
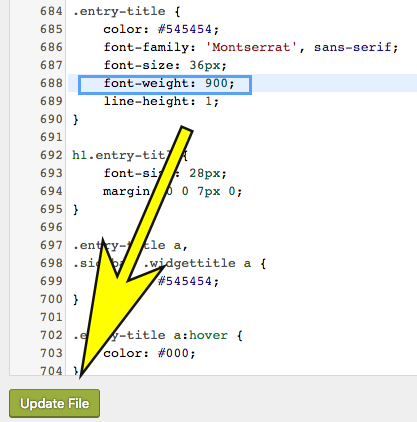
We want the blog post title to be a bit stronger, so we’re going to change it from 300 to something larger. You can experiment with different numbers to see the weight you like best, but in this instance, we’ll change it to 900 and then hit “UPDATE FILE.”
Voila, the blog post title is now bolded as a result of changing the value of the font-weight in the stylesheet.

NOTE: When changing elements of your website, you may have to Clear Your Cache in order to see that the change was made. And you may have to do this after every edit.
How to change H2 and H3 Font Colors Modern Blogger Pro Theme
When you want to change the font color, font weight, font height, padding or other attributes of the H1, H2, H3, H4, H5, or H6 heading tags look for the */ Headings towards the top of the Stylesheet below the */ Default section and above the */ Genesis section.
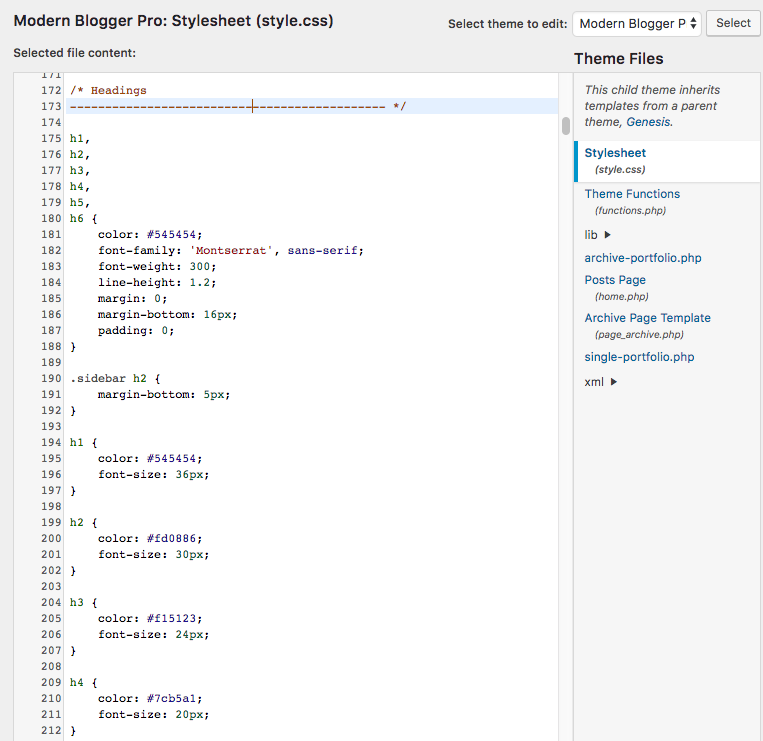
Now we will change the H2 color to #6c2dcb (purple) and the H3 color to #365fe5 (blue).
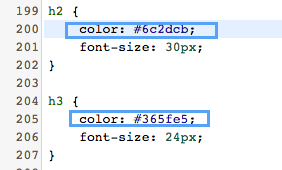
When we click “UPDATE FILE” we can see that both the H2 and H3 headings have changed to the new colors.

What if we wanted to make the H2 heading stronger though? Simple enough – we can just add the font-weight attribute and set the numeric option. In this case, we selected 500.
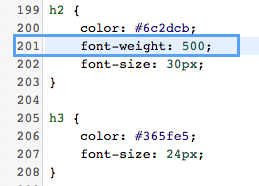
After you hit “UPDATE FILE” you can see that the H2 heading is now bolder.

Final note, don’t be afraid of the stylesheet of your WordPress theme. Even though this tutorial was specific to Pretty Darn Cute‘s Modern Blogger Pro theme, the principles of editing css can be applied to any other theme.

Leave a Reply