
*This post contains affiliate links, which means that by clicking on a link and purchasing a product, I’ll receive a small commission, at no additional cost to you. Please see my disclosure policy for details.
If you’ve already set up a domain with Siteground’s Grow Big or Go Geek hosting and you’re ready to add a second domain, this tutorial will show you to add more than one domain to your Siteground account.
Additional Domains are Called Addon Domains
An Addon Domain is the term referring to any additional domains added to your hosting account in Siteground beyond the first (or primary) domain.
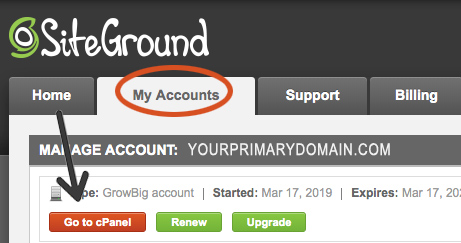
To add an addon domain, go to the ACCOUNT tab and click on “Go to cPanel” for the primary domain.
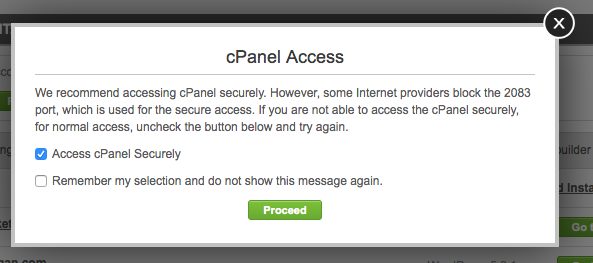
When the cPanel pop-up message comes up click “Proceed.”
Under the Domains section, click on “Addon Domains“:

Enter your second domain in the Domain Name field.
After you do, the next two fields (Subdomain or FTP Username and Document Root) will auto-populate.
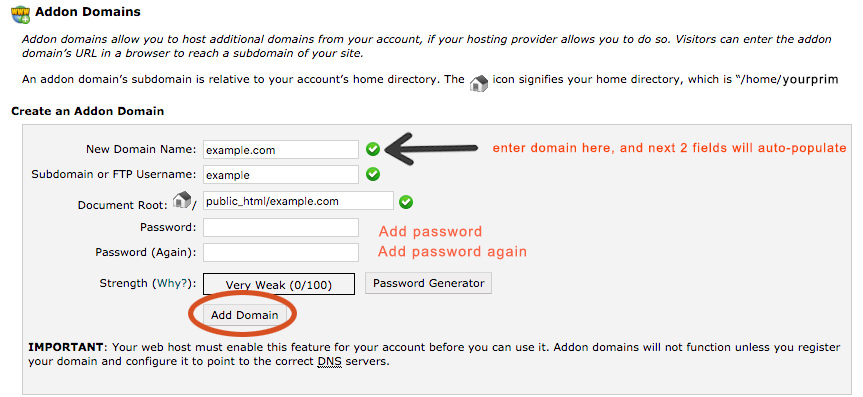
Now enter a strong password and enter that password again. (This will be your FTP login password for accessing files on your server.)
Lastly, click on the “Add Domain” button.
You can see that you successfully added that second domain as it should now be displaying on your External Domains list at the bottom of any dashboard tab (ie. Information & Settings, Extra Services, Installations, Sitebuilder tabs):

And that’s how to easily add more domains to your Siteground hosting account.
This next step is optional, but strongly recommended.
Activate Free SSL & HTTPS
Siteground’s Grow Big plan or Go Geek plan comes with Free SSL & HTTPS. After adding your additional domain as outlined above, you want to be sure to activate this free feature, so your domain will be https secure.

To activate Free SSL & HTTPS on the domain you just added, do the following:
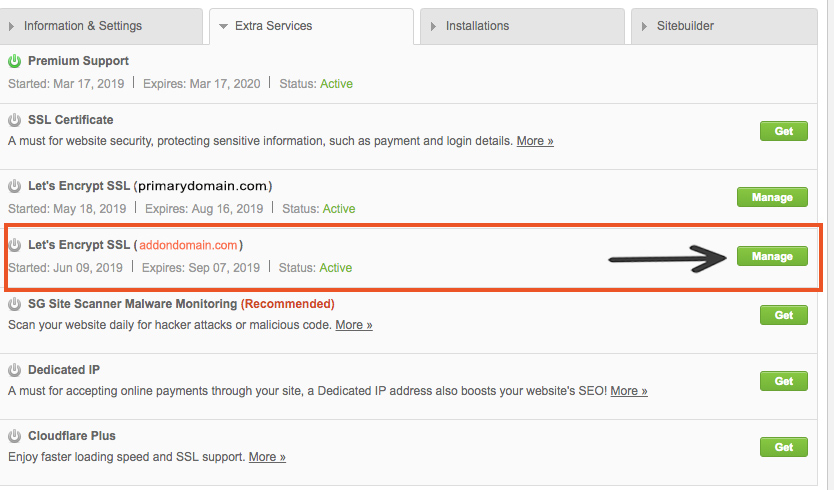
Go to the tab called “Extra Services” and look for the domain you just added. It will say “Let’s Encrypt SSL (addondomain.com).” Then click on the green “Manage” button to the right of that line item.
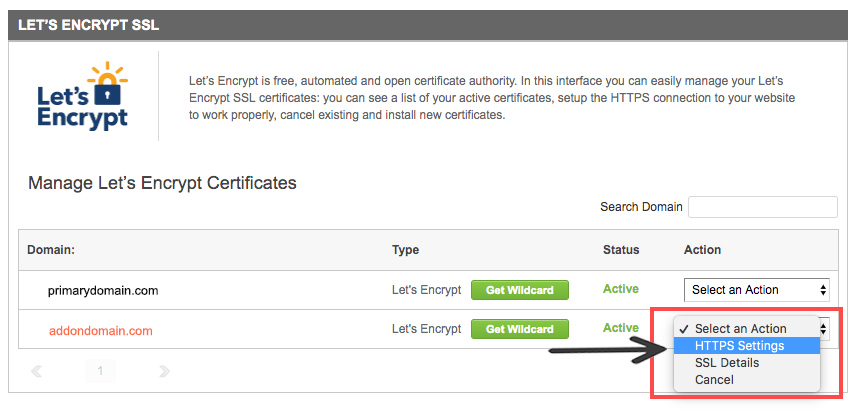
You’re now on the “Let’s Encrypt” page. Find the addon domain you just added and in the right-hand dropdown menu select “HTTPS Settings“:
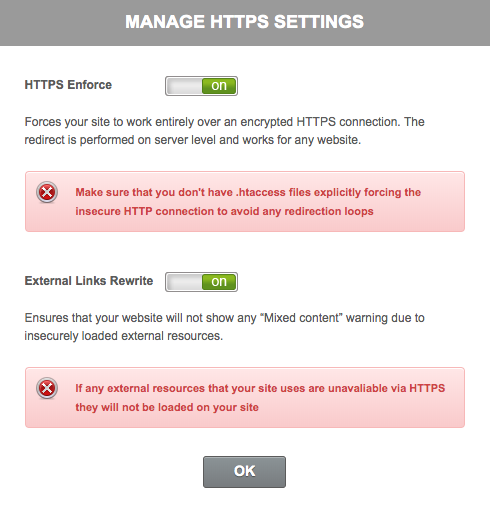
Turn the two buttons (for HTTPS Enforce and External Links Rewrite) to the “ON” position and click “OK.”
And you’re done.

A Note about Nameservers
Don’t forget that you have to be sure you have your domain’s Nameservers pointing to Siteground. If you have your domain registered with Namecheap, you can check out our tutorial on how to set custom dns nameservers in Namecheap to point to Siteground.

Leave a Reply