*This post contains affiliate links, which means that by clicking on a link and purchasing a product, I’ll receive a small commission, at no additional cost to you. Please see my disclosure policy for details.
The December 2018 release of WP 5.0 is a game-changer. If blogging always seemed like a chore to you, you’re going to love what’s new with the latest WordPress 5.0 update. The WordPress 5.0 changes and features will change the way you feel about writing blog posts and churning out blog content. I know it has for me. With WP 5.0’s introduction of Gutenberg Building Blocks Editor, blogging is easier, faster and more fun than ever! In fact this is my second blog post of the day and it’s not even noon.

Keep in mind, best practices when updating any new version of WordPress, are to back up your site fully before doing so.
WP 5.0 What Changed?
What changed with WP 5.0? Virtually everything. WordPress Gutenberg is a streamlined editor built on the foundation of building block modules. Previously, using WordPress entailed a certain amount of frustration with trying to get things to line up correctly or have appropriate spacing or line breaks between element. Inevitably your post would end up looking like a hot mess inside the editor, in order to get it to look normal in the published version. And that was a pain in the you know what.
Meet WordPress 5.0 Gutenberg Editor
Here is what the interface looks like inside new post view in the Gutenberg Editor.
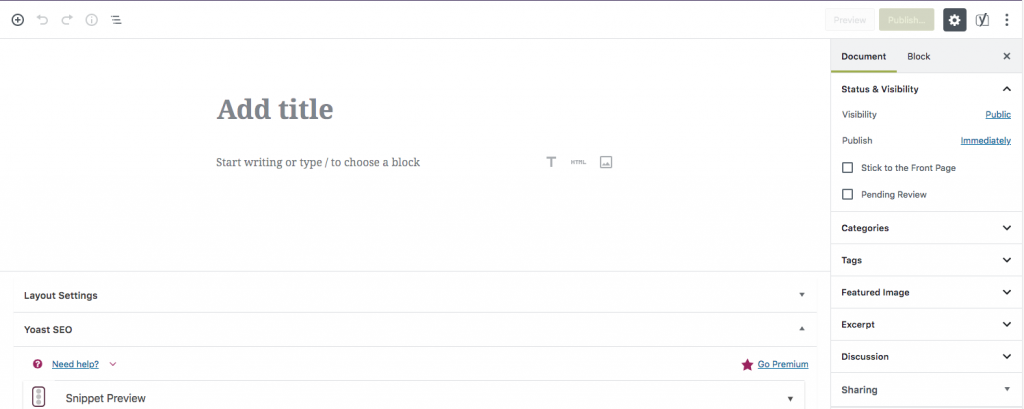
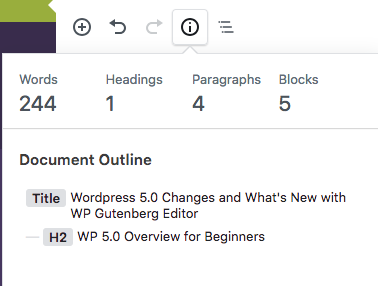
Top left has easy access icons to add a module, undo, get information. If you click the “i” information icon, you can see basic stats about your post such as word count, # of headings, # of paragraphs, # of blocks, and document outline structure.
WordPress Gutenberg: Anatomy of a Block
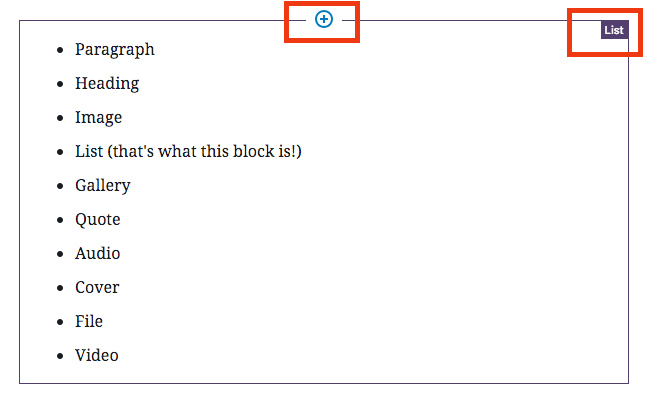
If I hover over a content block (see image below), Gutenberg places an rectangular outline around the block, tells me the type of block it is in the top right (in this case it’s a list), and displays a “plus sign” on the top. If I click on the “plus sign” it allows me to add a new block. This new block will be placed above that block.
If I click inside a content block, an editing toolbar will appear with options for tweaking the content for that block type:

Clicking on the three dots will reveal additional options: These include Hide Block Settings, Duplicate, Insert Before, Insert After, Edit as HTML, Add to Reusable Blocks, or Remove Block (to delete).
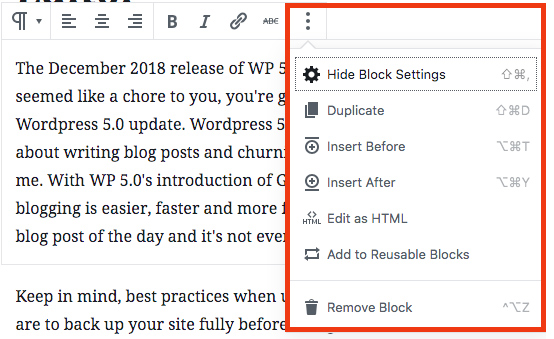
You can toggle between HTML (code) view and Image view in each block.

What Kind of Content Blocks can I add in WP 5.0 Gutenberg?
The following will give a quick overview of all the different types of content blocks you can add with the Gutenberg editor. When creating a blog post, you can add the following content blocks to build your article.
Common Blocks
- Paragraph
- Heading
- Image
- List (that’s what this block is!)
- Gallery
- Quote
- Audio
- Cover
- File
- Video
Formatting
- Custom HTML
- Table
- Code
- Classic
- Preformatted
- PullQuote
- Verse
Layout Elements
- Media + Text
- Spacer
- Columns
- Button
- More
- Page Break
- Separator
Widgets
- Shortcode
- Archives
- Category
- Latest Comments
- Latest Posts
Embeds
- Embed
- WordPress
- Animoto
- YouTube
- SoundCloud
- Spotify
- Flickr
- Vimeo
- Cloudup
- CollegeHumor
- Daily Motion
- Funny or Die
- Hulu
- Imgur
- Issuu
- Kickstarter
- Meetup.com
- MixCloud
- Photobucker
- Polldaddy
- Polldaddy
- ReverbNation
- Screencast
- Scribd
- Slideshare
- SmugMug
- Speaker Deck
- TED
- Tumblr
- VideoPress
- WordPress.tv
Some Quick WordPress 5.0 Hacks
Changing Content Order in Gutenberg Editor
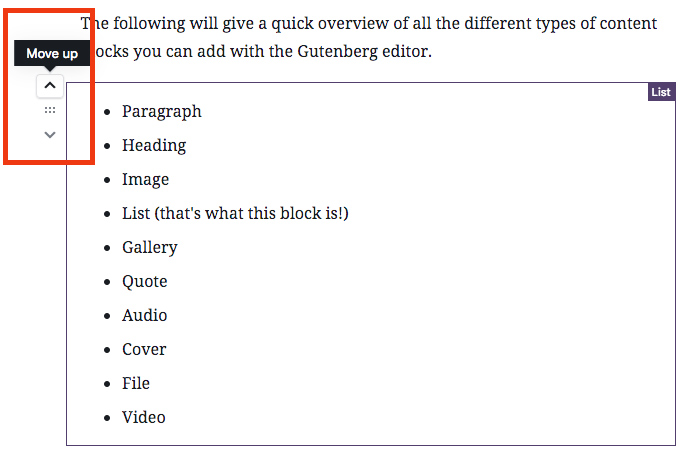
The joy of Gutenberg is that you can easily toggle the content around depending on how you want the content to flow. There is an up and down arrow in the upper left side of each block. You can either click the arrows or wait for the hand icon to appear when you hover over the 6 dots and do the drag and drop. This makes reconfiguring the flow of your blog post super easy.
Splitting 1 Block into 2 Blocks
If you write a chunk of text and you decide you want to break it up into multiple blocks, just hit the “enter” key where you want a new block to start.
For example, if I’m writing a paragraph about all the things I like about the new WordPress 5.0 and then realize I should have added an image in the middle of all that type, I would insert the cursor where I want the text to break off into a new paragraph block and hit the “return” key. Now I’ll have two paragraph blocks and I can add an image block between them.
Add Space Between Blocks with Another Block
Use the Layout Element, Spacer, to add distance between blocks. You can adjust the height of the spacer by clicking on and dragging the green circle.

Save Blocks You Want to Use in Other Blog Posts
With WP 5.0 you have the ability to create a library of content blocks that you want available for other posts. This can be a real time saver. For example, if I want to save the image and link to my Pinterest profile so I can easily place it on any blog article, I would do the following.
First, create the content block. Second, click inside the block, click on the 3 dots, and select “Add to Reusable Blocks.”
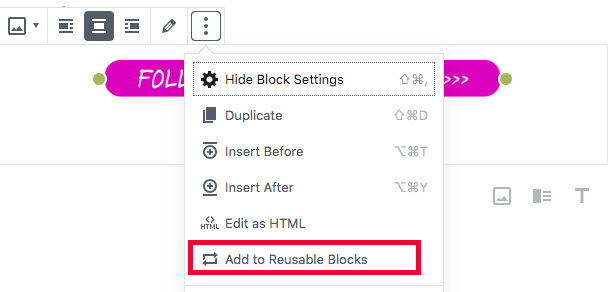
Name the reusable block and save it. You can also use the green dots to click and drag to resize any image.

WordPress now labels it as a Reusable Block as you can see on the top right.

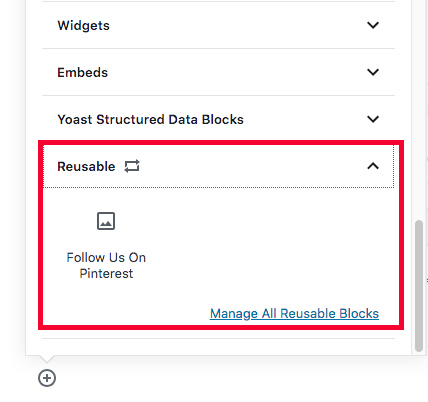
Now, whenever you click to add a new content block, there is an additional category in the “Add Block” panel titled, “Reusable,” and as you can see – there is the “Follow Us on Pinterest” block we just saved and it’s available to drop into any post.
Set Color for Font and/or Background of a paragraph.
Click inside the paragraph you want to color and the color palette will display on the right side. Select a default color:
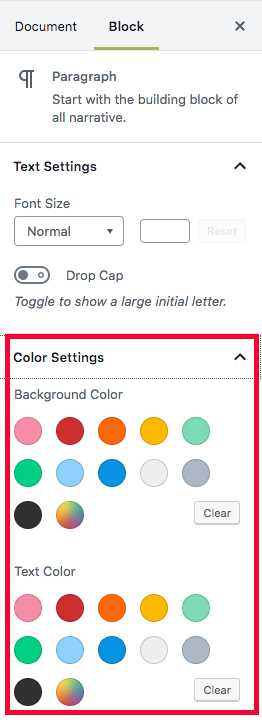
Like here we’ll make the text pink and the background yellow.
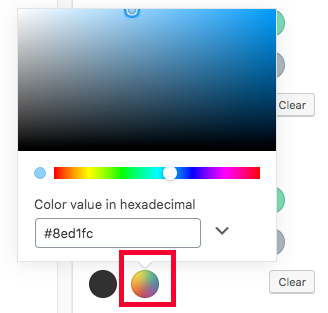
Or click on the gradient dot to open the color picker. Now you can match colors to your brand colors or other specific color theme.
Add a Call-to-Action Button on the Fly
Gutenberg gives you the ability to create a Call to Action button on the fly right inside WordPress. Now you don’t have to take time to make one in Canva or Photoshop and import it. Simply add the Layout Element called (appropriately) Button. Add the click to url and change the button color and the text to anything you like. Change the button style in the Styles menu.

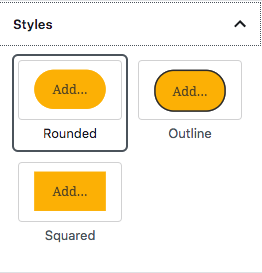
And, voila, here is my button!
Add a Quote
Select PullQuote if you want PullQuote > and then Quote is a sub-section of that.
Here is my PullQuote!
brilliant
Click the left icon to display the options:
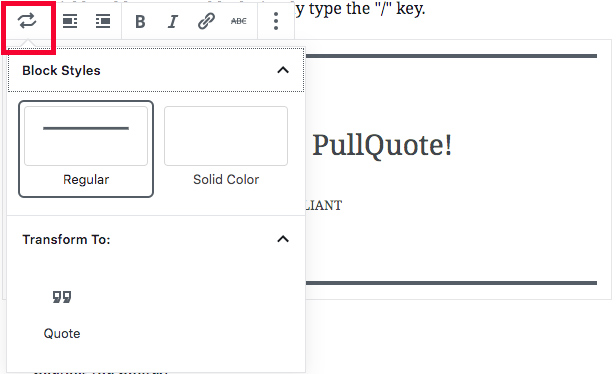
Here is my quote in quote style, a sub-selection of PullQuote!
Brilliant
Here is my verse quote,
perfect for poetry
or other prose.
How To Schedule a Post in WordPress 5.0
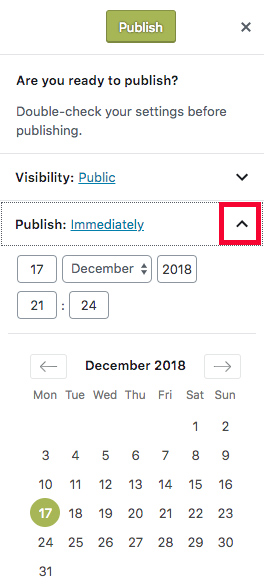
To schedule a post in the new editor, simply hit “Publish” once in the top right. After you click it once, you’ll see the options to schedule for a later date by clicking the dropdown arrow next to Publish. Select the date and time in the future or click Publish to publish immediately.
That’s my quick WordPress Gutenberg overview and introduction to its functionality. For bloggers, I think that WordPress 5.0 will alleviate much of the drudge associated with blogging regularly. I am already a fan.
Harness the full potential of WordPress 5.0 with Gutenberg optimized themes!Pin for Later
Recent Posts:
Leave a Reply